Most people don't realize that a poorly adjusted static bike can reduce their workout efficiency by up to 30% and potentially lead to joint strain. I've spent years helping clients optimize their indoor cycling setups, and I've discovered that even small adjustments can make the difference between a mediocre session and a transformative workout. While it might seem tempting to just hop on and start pedaling, taking the time to properly adjust your bike's settings won't just improve your comfort—it'll help you achieve better results and prevent unnecessary wear on your body. Let me show you how to maximize your indoor cycling experience with the right adjustments.
Some of the links in this article may be affiliate links. If you make a purchase through these links, we may earn a small commission at no extra cost to you. Thank you.
Key Takeaways
- Place the static bike on level ground and check all bolts and adjustable parts are securely tightened.
- Set the saddle height so your knee has a slight bend when pedal is at its lowest position.
- Position handlebars at saddle height and ensure elbows maintain a slight bend while gripping.
- Align the front of your knee directly above the pedal's center when seat is properly positioned.
- Keep your back straight, rotate hips forward, and maintain a relaxed grip on the handlebars while riding.
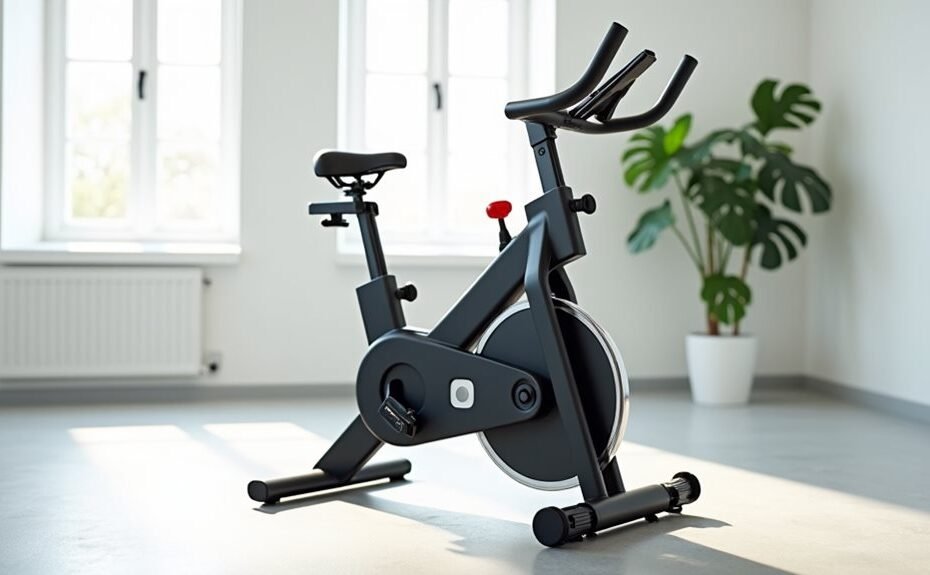
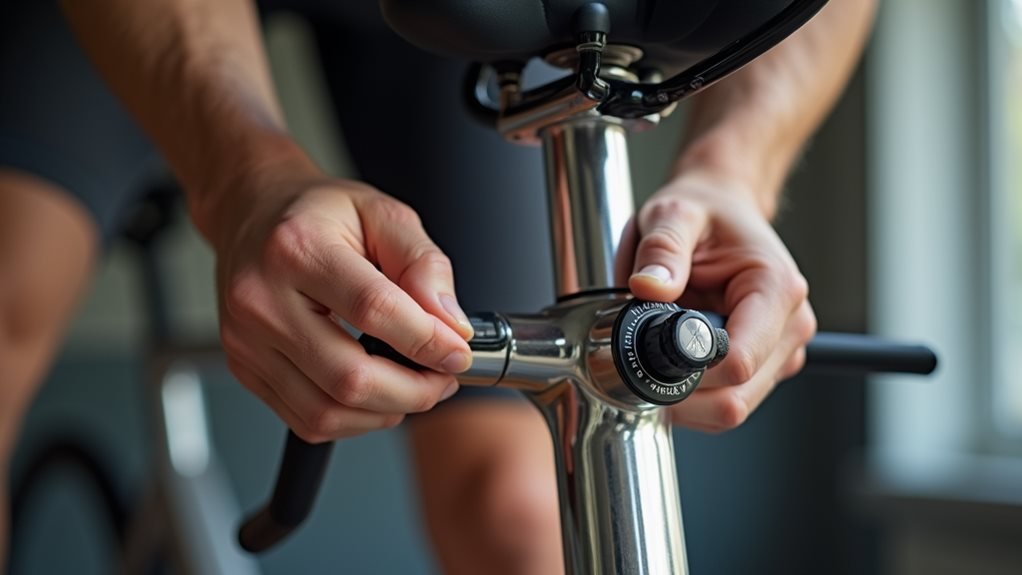
Basic Safety for Bike Setup
A safe and properly adjusted stationary bike setup forms the foundation for an effective indoor cycling experience. I'll walk you through the essential safety measures you can't afford to skip – because nobody wants their workout derailed by preventable issues.
Start by confirming your bike sits on completely level ground. I'm talking zero wobble here. Check every bolt and adjustable part – they should be tight enough that you couldn't loosen them without tools. Trust me, there's nothing worse than a seat that suddenly drops mid-sprint. Taking time for proper form adjustments will help prevent potential injuries during your workout. Check the bike's weight capacity to ensure you're using equipment suited to your body type. Regular maintenance checks are crucial as fitness changes and joint concerns develop over time.
Create a clean zone around your bike – I recommend at least two feet on each side. Keep the kids, pets, and random clutter far from those spinning pedals. And while you're at it, position your water bottle and towel within easy reach. You won't want to stretch or dismount mid-workout.
Before you hop on, do a quick stability test. Give the handlebars a firm shake and confirm the base doesn't budge. If anything feels loose or wobbly, address it immediately. Remember: a properly secured bike isn't just about comfort – it's about preventing accidents that could sideline your training.
Finding Your Ideal Saddle Height
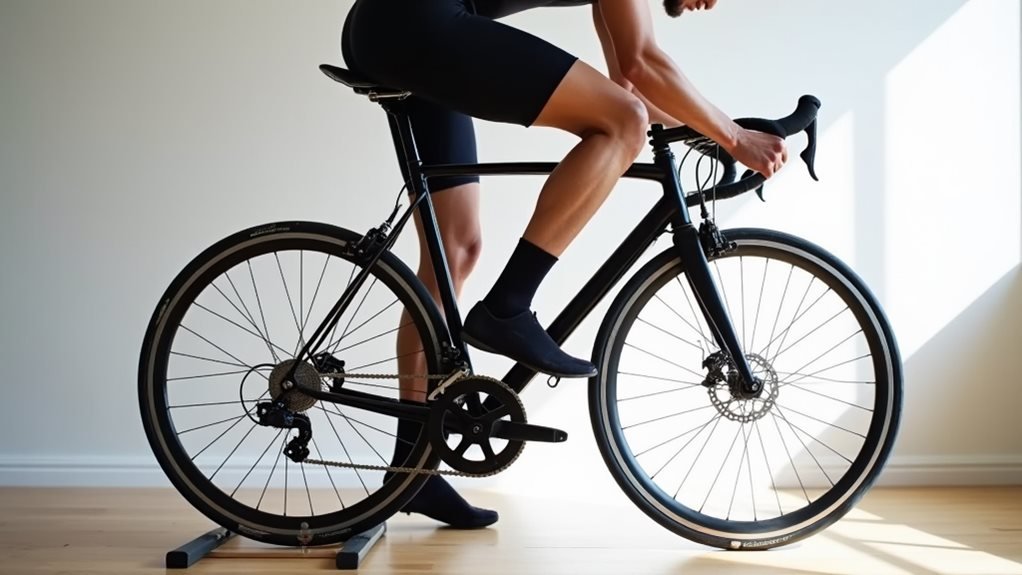
How high should your bike saddle be? Let me show you four foolproof methods to get it right.
First, try the heel-toe approach – it's quick and dirty but gets you close. Place your heel on the lower pedal with the crank aligned with the seat post. Adjust until your leg's straight, then drop it 10-15mm. Done. Making corrections progressively helps you achieve optimal pedaling efficiency. A proper height setting will prevent knee pain during your workouts.
Want something more precise? Measure your inseam and multiply it by 0.883 (LeMond method) or 1.09 (Hamley method). This gives you the distance from pedal axle to saddle top. It's not perfect, but it's a solid starting point.
For a visual check, stand next to your bike and align the saddle with your hip bone. When you're seated, you'll want a slight knee bend at the bottom of your pedal stroke. The ball of your foot should sit right over the pedal axis.
Achieving Perfect Handlebar Position
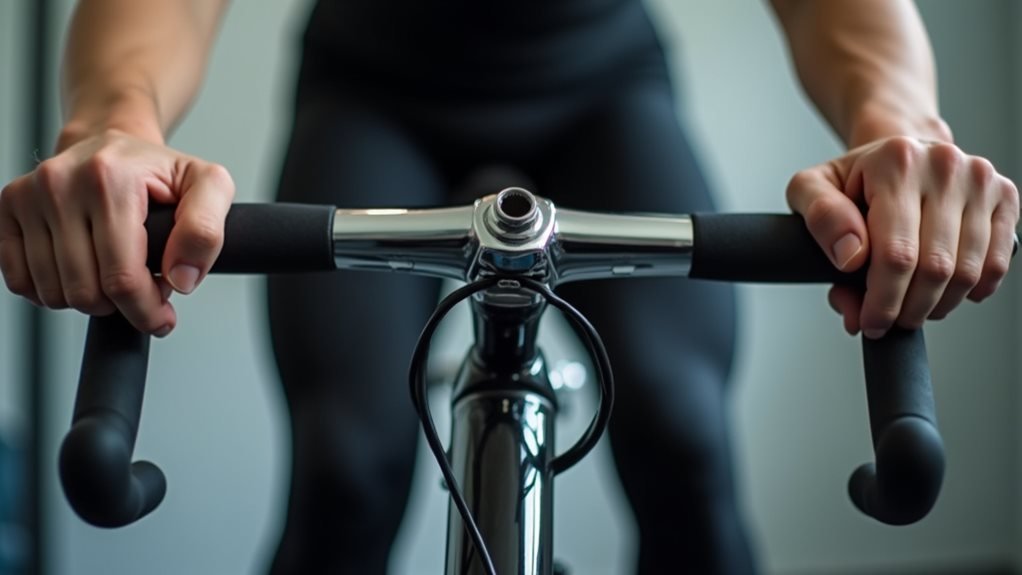
When setting up your handlebar position, getting it right is just as crucial as saddle height. I'll help you nail the perfect position to maximize comfort and performance while preventing injury. Let's break down the key adjustments you need to make.
| Adjustment | Correct Position | Why It Matters |
|---|---|---|
| Height | Aligned with saddle | Promotes natural arm extension |
| Reach | Slight elbow bend | Prevents shoulder strain |
| Rotation | Tilted slightly upwards | Ensures neutral wrist position |
Start by setting your handlebars at saddle height – that's your baseline. If you're new to cycling or dealing with back issues, I suggest going slightly higher. Trust me, your spine will thank you. For the reach, you want your arms naturally extended with a slight bend in your elbows. No T-Rex arms, please. You can use adjustable stems to experiment with different positions until you find your ideal setup. Always inspect the stem allen screws before making any adjustments to prevent potential issues.
Now, here's something most people get wrong: don't fixate on keeping your handlebars parallel to the ground. Instead, rotate them slightly upward until your wrists feel neutral. And those brake levers? Angle them inward a bit. It's not about looking pro – it's about keeping your hands content during long rides. Proper bike fit can help engage core muscles and enhance overall cycling performance by ensuring optimal body positioning.
Forward and Back Saddle Positioning
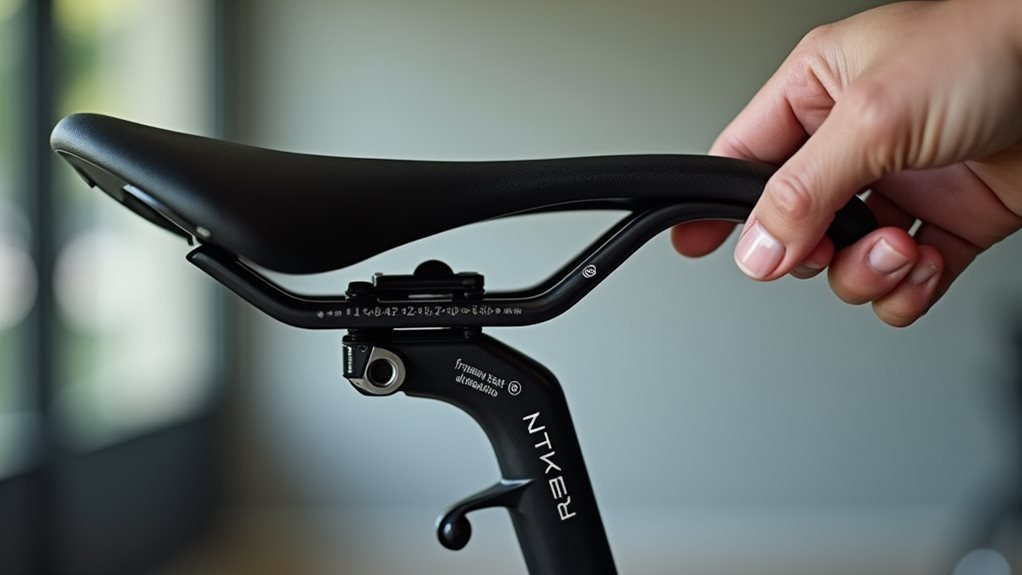
Getting your saddle's forward and back position right can make or break your cycling experience. I'll show you how to nail this pivotal adjustment in minutes.
Taking time to find the right position will save you from future discomfort and avoid injuries later. A neutral seat angle helps keep you stable and prevents sliding forward. Start by standing on your bike with the pedals at 3 and 9 o'clock positions – think of a perfect horizontal line. Your front knee should align directly above the pedal's center.
Here's the deal: if your knee's too far forward or back, you're asking for trouble. Move the saddle until your kneecap sits precisely above the pedal center. Trust me, this isn't just about comfort – it's about preventing injury and maximizing power transfer. You'll want a 25 to 35-degree bend in your knee at the bottom of each stroke.
For a quick check, place your heel on the pedal and pedal backward. Your knee should straighten completely at the bottom – if it doesn't, adjust your saddle height. If you're particularly tall or short, you might need more extreme adjustments. Can't get comfortable? Don't mess around – get a professional bike fitting. Your knees will thank you later.
Making Final Bike Adjustments
After setting your saddle position, it's time to dial in those final adjustments that'll make your ride smooth and comfortable. I'll walk you through the essentials – trust me, your body will thank you later.
Start with your handlebars. Use your elbow to measure distance between the seat and handlebars for proper positioning. I want you to adjust them to match your saddle height – or even higher if you're new to this or have back issues. Your elbows should be slightly bent, shoulders relaxed. If you're feeling neck strain, tweak that height until it feels right. Begin with small resistance levels to ensure proper form and prevent injury.
Now let's check your pedal position. Put one pedal at 6 o'clock – that's the lowest point. Your knee should have a slight bend here. The ball of your foot? Center it right over the pedal.
When your pedals are horizontal, your front kneecap should align perfectly with the pedal center.
Essential Cycling Form Tips

Your cycling form can make or break your indoor riding experience. I'll help you nail the fundamentals that separate amateurs from experts. Think of your body as a power-generating machine – every component needs to work in harmony.
Let's tackle the three most critical form elements:
- Push those pedals in squares, not circles. Imagine tracing a perfect square with your feet: push forward at the top, down the front, scrape the bottom, and pull up the back. This maximizes power through the entire stroke.
- Keep your back straight but not rigid. Rotate those hips forward, engage your core, and maintain a slight forward lean. Your spine will thank you later.
- Relax those death grips on the handlebars. Soft elbows, relaxed shoulders, and a gentle grip will prevent unnecessary tension and fatigue.
Remember to check your form periodically during rides. I'm talking about those moments when you're gasping for air – that's exactly when form tends to break down. Keep your chest open, your core engaged, and your knees tracking straight. Trust me, proper form transforms a good workout into a great one. Low-impact exercise with a dual-action bike can provide both cardiovascular and strength training benefits while being gentle on your joints.
Frequently Asked Questions
How Often Should I Readjust My Bike Settings if I'm the Only User?
I recommend checking your bike settings monthly, but if you notice any discomfort or change in form, adjust immediately. Regular maintenance guarantees peak performance and prevents potential injuries.
Can Incorrect Bike Settings Cause Long-Term Knee or Back Problems?
I can confirm that incorrect bike settings can definitely cause long-term problems. If your knees and back aren't properly aligned during rides, you're risking chronic pain and potential injuries.
Should Bike Settings Be Different for Speed Training Versus Endurance Workouts?
Like a chameleon changing colors, I'll adjust my bike differently for each goal. I'll set handlebars lower for speed training but higher for endurance to maintain comfort over longer rides.
Do Bike Settings Need to Change as I Lose or Gain Weight?
I recommend adjusting your bike settings as your weight changes to maintain proper alignment. You'll want to check seat height, handlebar position, and knee angles regularly for ideal comfort.
What's the Best Way to Mark My Preferred Settings for Quick Setup?
I recommend using a permanent marker to record your saddle height, handlebar position, and horizontal settings on the adjustment poles. Take photos on your phone for backup reference.